
macOS Serial Port Names Explained: `/dev/cu.*` vs `/dev/tty.*` (and which one to use)
Short answer
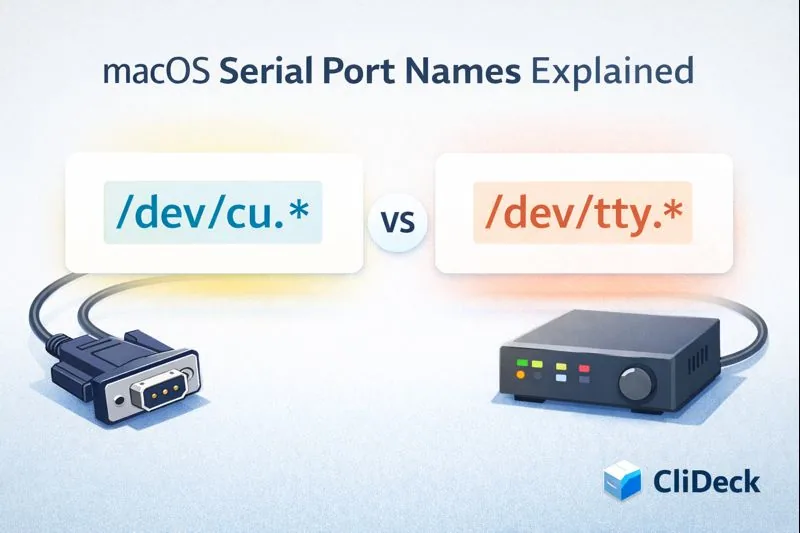
For outbound serial-console connections on macOS, use the adapter’s /dev/cu.* path in most cases rather than /dev/tty.*. The /dev/cu.* device is intended for initiating the connection, while /dev/tty.* is generally for incoming or carrier-detect behavior.
Why macOS shows two device names for one serial port
When you connect a USB-to-Serial adapter, macOS often creates two device nodes that look almost identical:
/dev/cu.usbserial-XXXX/dev/tty.usbserial-XXXX
This does not mean you have “two different ports.” It’s the same underlying serial line exposed via two access styles:
cuis the “callout” device (think: “outgoing connection,” open the port now)ttyis the “dial-in / call-in” device (think: “incoming line,” where open behavior may differ)
In real-world terms, the rule is simple: if you’re initiating an interactive console session yourself, use /dev/cu.*.
Which one should you use: /dev/cu.* or /dev/tty.*
Use /dev/cu.* almost always
/dev/cu.* is the best default for:
- console access to network gear (Cisco/Juniper/Arista, etc.)
- USB-Serial adapters (FTDI/CP210x/CH340 and similar)
- UART debug on boards and embedded devices
- any scenario where you want to connect, see output, and type commands
Practical reason: /dev/cu.* typically opens immediately and predictably, without “waiting” behavior.
Use /dev/tty.* only if you know you need it
/dev/tty.* makes sense in rarer scenarios where you need “incoming line” behavior (for example, when a service or a specific workflow treats the port as an inbound terminal line).
If you’re unsure, it’s probably not your case.
Comparison table
| Topic | /dev/cu.* | /dev/tty.* |
|---|---|---|
| Typical purpose | “Connect now” | “Incoming line / special open behavior” |
| Best for serial console sessions | Yes (default) | Usually no |
| Chance of confusing behavior in day-to-day use | Lower | Higher |
| Recommendation | Use in almost all cases | Use only when required |
How to find the “right” port on macOS
1) List all callout ports (usually what you want)
ls -1 /dev/cu.*
2) List all dial-in ports
ls -1 /dev/tty.*
3) The most reliable method: diff before/after
ls -1 /dev/cu.* > /tmp/cu_before.txt
# plug in the adapter
ls -1 /dev/cu.* > /tmp/cu_after.txt
diff /tmp/cu_before.txt /tmp/cu_after.txt
The line that appears is your port.
Common port name examples (what you might see)
In practice you’ll often see:
/dev/cu.usbserial-*/dev/cu.SLAB_USBtoUART/dev/cu.wchusbserial*/dev/cu.usbmodem*
The rule doesn’t change: use the /dev/cu.* version, not the matching /dev/tty.*.
How to use the selected port (two common approaches)
Option A: cu (built-in)
Example for 9600 baud (a very common default for network console ports):
cu -l /dev/cu.usbserial-XXXX -s 9600
Exit cu safely:
- press Enter (so
~is the first character on the line), - then type
~.
Option B: screen
screen /dev/cu.usbserial-XXXX 9600
If you use screen, the same device rule applies: /dev/cu.*.
Why it can feel like the port is “stuck” (and the fast fix)
If you chose /dev/tty.* and the session feels odd (slow to open, no output, “hung” behavior), switch to the matching /dev/cu.*.
Quick checklist:
- Make sure the port exists:
ls -1 /dev/cu.*
- Make sure nothing else is using it:
- close IDE serial monitors and any other terminal sessions that might hold the port
- Try the two most common baud rates:
cu -l /dev/cu.usbserial-XXXX -s 9600
cu -l /dev/cu.usbserial-XXXX -s 115200
- If you see garbled characters, it’s almost always a baud rate mismatch.
Where CliDeck helps (and why it complements cu)
cu is a great choice when you need to connect quickly, locally, and offline to a single device. But as soon as your workflow grows beyond “connect and exit,” you usually miss three things:
- multiple devices and sessions in one place (without juggling dozens of terminal windows)
- history and logs (so output isn’t lost and can be reviewed later)
- browser access and a team-friendly workflow
That’s exactly why we build CliDeck: CliDeck Features.
Mini FAQ
Why do I have both /dev/cu.* and /dev/tty.*?
Because macOS exposes two access styles to the same serial line: “callout” and “dial-in.” For everyday console work, you almost always want callout.
Which one should I use for routers/switches/Arduino?
/dev/cu.*.
Can I break anything by opening /dev/tty.*?
Usually not. But you can waste time troubleshooting confusing behavior. Using /dev/cu.* avoids that in most cases.
Bottom line
If you’re initiating a serial console session from a Mac, use /dev/cu.*. It’s the most practical and predictable option.
And when you need more than “connect and exit” (multiple devices, session history, logs, browser access), try CliDeck: CliDeck Workspace.
Who this is for
This guide is for network engineers, field technicians, remote hands, lab engineers, and system administrators who need to connect to, troubleshoot, log, or verify a serial console session on switches, routers, firewalls, appliances, servers, and other devices with console ports.
When to use this
Use this guide when:
- You need direct console access to a switch, router, firewall, appliance, server, or lab device.
- SSH or management-plane access is unavailable, unreliable, or not yet configured.
- You need to troubleshoot a USB serial adapter, COM port, baud rate, or terminal session.
When not to use this
Do not use this guide when:
- Do not use this guide as a substitute for vendor documentation, site policy, or a verified device-specific runbook when the operation is risky.
- Do not continue if the console output suggests you are connected to the wrong device.
Quick checklist
- Identify the device and console connector
- Use the correct console cable or adapter
- Find the correct serial port or COM port
- Start with the expected baud rate and 8N1 settings
- Press Enter to confirm the prompt
- If output is unreadable, check baud rate and line settings
- If the port will not open, check permissions, drivers, and whether another program is holding the port
- Save useful session notes or logs when the work matters
Traditional cable vs CliDeck workflow
A traditional USB serial cable is still the simplest option for quick local work. CliDeck becomes useful when the console session needs browser access, notes, runbooks, sharing, logs, remote hands support, or a portable controller workflow.
Console Server Go can work like a wired USB serial adapter when connected by USB, but it also adds SSH Console on SSH-enabled firmware builds, browser Workspace, live sharing, 24h+ battery operation, OLED status, and magnetic rack mounting.
Quick decision table
| Situation | Better fit | Why |
|---|---|---|
| One authorized engineer needs a quick low-risk task | Traditional local workflow | It keeps the workflow simple when no shared context, batch work, or durable evidence is required. |
| The work needs verification, handoff, or documentation | CliDeck or browser workspace workflow | It creates a clearer path for notes, logs, stop conditions, and final checks. |
| Multiple people or devices are involved | CliDeck or browser workspace workflow | Structured workflows reduce ambiguity and make it easier to prove what happened. |
When option A is enough
The simpler option is usually enough when one authorized engineer is doing a low-risk task locally, the device state is known, and the work does not require shared context, batch processing, or durable evidence.
When option B is better
The more structured option is better when the work needs repeatability, collaboration, verification, logging, asset linkage, or a safer handoff between people or teams.
Workflow
- Identify the device, connector, cable, adapter, and host operating system.
- Find the correct serial port or COM port and confirm permissions or drivers.
- Open the session with the expected baud rate and line settings, usually 8N1 unless documented otherwise.
- Press Enter and verify the prompt before running commands.
- Save notes or logs when the session supports a change, recovery, handoff, or evidence workflow.
Verification checklist
- The detected serial port or COM port matches the connected adapter.
- Baud rate, data bits, parity, stop bits, and flow control match the device expectation.
- The terminal shows a readable prompt after pressing Enter.
- No other terminal application is holding the port.
- Useful notes or logs are saved when the work matters.
Common mistakes
- Using the wrong cable or adapter for the console connector.
- Opening the wrong COM port or
/dev/cu.*device. - Assuming unreadable output means hardware failure before checking baud rate and 8N1 settings.
- Leaving another terminal application attached to the port.
CliDeck workflow fit
A traditional USB serial cable is still the simplest option for quick local work. CliDeck becomes useful when the console session needs browser access, notes, runbooks, sharing, logs, remote hands support, or a portable controller workflow.
Console Server Go can work like a wired USB serial adapter when connected by USB, but it also adds SSH Console on SSH-enabled firmware builds, browser Workspace, live sharing, 24h+ battery operation, OLED status, and magnetic rack mounting.
FAQ
Is a USB serial cable still enough?
Yes, for simple local work where one engineer is sitting next to one device. CliDeck is more useful when the console session needs sharing, runbooks, browser Workspace, remote hands support, logs, or longer operational context.
What should I check first when serial output looks like garbage?
Check the baud rate, data bits, parity, stop bits, flow control, cable type, and whether the device is actually using the expected console port.
Can CliDeck help with serial console work?
Yes. CliDeck Workspace helps organize terminal sessions, notes, runbooks, and logs. Console Server Go adds portable rack-side access, and Net Controller supports larger batch workflows.
Related guides
- Linux Serial Disconnects: Collect the Right Boot and Time Window - Collect Linux serial-disconnect evidence from a specific boot and UTC time window while preserving journal permissions, retention and kernel-only limits.
- Linux Serial Permissions: Check Identity, Groups and ACLs - Inspect Linux serial-device identity, groups, node permissions and ACL masks before changing access or opening the console port.
- Linux Console Capture Storage: Check Blocks and Inodes - Check the actual Linux console capture filesystem for available blocks and inodes, and keep directory usage separate from capture completion.
- Console Capture Times: UTC Without False Precision - Record console capture times in UTC with the clock source and uncertainty; keep device events separate and avoid unsupported precise ordering.
- Linux Serial Settings: Inspect stty Without Guessing the Console Profile - Inspect GNU stty settings for an identified serial adapter, compare framing and flow control, and account for device-open effects and session ownership.