
Connecting to Serial (Console) Ports on macOS with the screen Utility: A Practical Guide
Short answer
To open a serial console on macOS with screen, find the adapter’s /dev/cu.* port and run screen <port> <baud-rate>, usually starting at 9600. If the console does not respond, verify the cable, selected port, speed, and flow-control settings before troubleshooting further.
Introduction
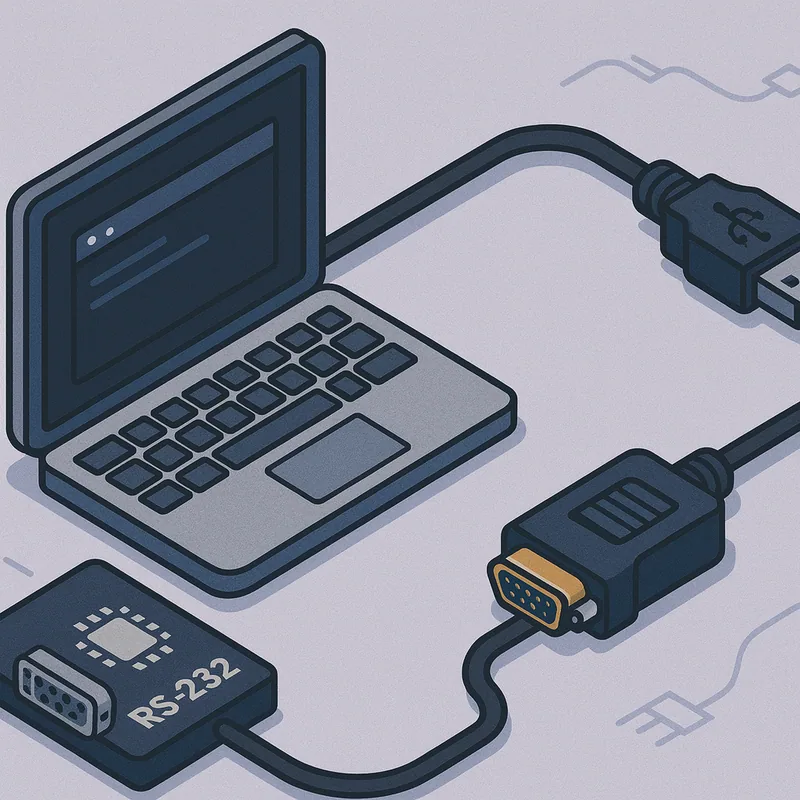
If you work with network or server hardware, sooner or later you have to connect to a console (RS-232) port through a USB-to-Serial cable. On macOS, the simplest built-in tool for that job is the command-line utility screen. It ships with the OS, runs in a regular Terminal window, and does not require any extra GUI tools.
In the CliDeck project we build a more convenient browser-based terminal with logging, automation, and multi-device workflows, but screen is still the baseline tool that exists on every Mac. This guide explains how to use screen properly: how to find the right /dev device, how to connect to a console port, which hotkeys matter, and how to debug typical problems.
1. What screen is and why it is useful for serial work
screen is a terminal multiplexer. It runs one or more shells inside itself and lets you:
- keep multiple virtual “windows” in one Terminal;
- keep sessions alive even if your SSH connection drops;
- log output to files;
- attach to serial ports as if they were normal TTY devices.
On macOS, screen is preinstalled. That makes it a convenient basic tool for emergency access to routers, switches, servers, and embedded boards over a console port, especially on systems where you cannot or do not want to install extra software.
2. Verifying screen on macOS
Open Terminal (Spotlight → type Terminal → Enter) and check the version:
screen --version
On a stock macOS you will usually see:
Screen version 4.00.03 (FAU) 23-Oct-06
This classic version:
- supports horizontal splits (
Ctrl+AthenShift+S); - does not provide vertical splits by default (those exist in newer GNU Screen builds installed via Homebrew or MacPorts).
For serial console tasks like “connect, configure, disconnect”, the built-in version is good enough.
3. Plugging in the USB-to-Serial cable and allowing access
3.1. The “Allow accessory to connect?” dialog
On Macs with Apple Silicon and recent macOS versions, each new USB accessory must be explicitly allowed.
After you plug in an FTDI/CP210x/CH340 cable you may see a dialog:
Allow accessory to connect? Do you want to connect “FTDI FT232R USB UART” to this Mac? Don’t Allow / Allow
You must click Allow. If you click Don’t Allow, the adapter:
- may draw power,
- but it will not appear as a serial device under
/dev.
You can later adjust this behavior under System Settings → Privacy & Security → Allow accessories to connect.
3.2. Checking that macOS sees the adapter at all
To verify that the adapter is visible on the USB level:
-
Hold
Optionand click the Apple menu → System Information… -
Under Hardware → USB, look for entries like:
- FT232R USB UART (FTDI),
- CP2102 USB to UART Bridge Controller (Silicon Labs),
- USB-Serial Controller / CH340 (CH34x-based adapters),
- or a device name from your adapter’s vendor.
If nothing appears there, the problem is physical (cable, port) or driver-related.
4. Finding the right /dev port
The main practical problem is not running screen, but finding the correct device name under /dev after you plug in the cable.
4.1. Minimal “before and after” method
-
Open Terminal.
-
Before plugging in the cable, list candidate ports:
ls /dev/cu.*Save or remember the output.
-
Plug in the USB-to-Serial adapter and click Allow in the dialog if it appears.
-
Run the command again:
ls /dev/cu.* -
Compare the two lists. The new line is your serial adapter.
Typical names on macOS:
/dev/cu.usbserial-A9H4CHBR– FTDI;/dev/cu.SLAB_USBtoUARTor/dev/cu.usbserial-0001– CP210x;/dev/cu.wchusbserial110– CH340/CH341;/dev/cu.usbmodem1101– many CDC ACM devices and dev boards.
4.2. Exploring /dev directly
If you want to inspect /dev manually:
cd /dev
ls cu.*
ls tty.*
cu.*are “call-out” devices used for outgoing connections. These are whatscreen, Arduino IDE, and most tools use on macOS.tty.*are the corresponding “call-in” side. For serial console work you normally stick tocu.*.
4.3. Using patterns and completion
Often it is enough to remember the pattern rather than the exact name. For example:
- FTDI:
cu.usbserial-* - CP210x:
cu.*USBtoUART*orcu.usbserial* - CH340:
cu.wchusbserial*
In the shell you can start typing and use tab completion:
screen /dev/cu.usbserial-<TAB> 9600
The shell will fill in the full device name.
5. Connecting to the console port with screen
5.1. Basic command
Most network devices ship with a default console setting of 9600 8N1. A typical connection command looks like:
screen /dev/cu.usbserial-A9H4CHBR 9600
Where:
/dev/cu.usbserial-A9H4CHBRis the device name you discovered in the previous step;9600is the baud rate (change to115200,19200, etc. if your device uses a different speed).
If everything is correct, you should see the device prompt or a blank screen that responds when you press Enter.
5.2. Exiting screen cleanly
Do not just close the Terminal window. That can leave a background screen process attached to the port.
Proper exit sequence:
- Press
Ctrl+A. - Release both keys.
- Press
\(backslash). - Confirm with
y.
This kills all screen windows in the session and releases the serial device.
If you only want to close the current window inside screen, you can use Ctrl+A then k and confirm.
6. Useful screen hotkeys on macOS
In the stock macOS screen version 4.00.03, all hotkeys start with the escape key Ctrl+A. Press Ctrl+A, release, then the second key.
| Key sequence | Action |
|---|---|
Ctrl+A ? | Show built-in help with all key bindings. |
Ctrl+A c | Create a new window (new shell). |
Ctrl+A n / Ctrl+A p | Next / previous window. |
Ctrl+A 0…Ctrl+A 9 | Switch to window 0–9. |
Ctrl+A A | Rename current window. |
Ctrl+A " | List windows and select with arrows. |
Ctrl+A d | Detach: leave the session running in the background. |
Ctrl+A r / screen -r | Reattach to a detached session. |
Ctrl+A S (Shift+S) | Split the screen horizontally into two regions. |
Ctrl+A Tab | Move focus to the next region. |
Ctrl+A X | Remove the current region (unsplit). |
Ctrl+A [ | Enter copy/scrollback mode. |
Ctrl+A ] | Paste from the copy buffer. |
Ctrl+A h | Toggle logging to screenlog.0 in the current directory. |
Ctrl+A k | Kill the current window. |
Ctrl+A \ | Kill all windows and exit screen. |
Note: vertical split (Ctrl+A |) is not available in the default macOS build; you only get horizontal splits.
7. Useful launch options
From screen --help on macOS, a few options are worth remembering for serial work:
-
screen -L /dev/cu.usbserial-A9H4CHBR 9600Start with logging enabled. Output goes toscreenlog.0. -
screen -h 5000 /dev/cu.usbserial-A9H4CHBR 9600Increase scrollback history to 5000 lines. -
screen -S switch_console /dev/cu.usbserial-A9H4CHBR 9600Start a session namedswitch_consoleso you can reattach to it later withscreen -r switch_console. -
screen -dmS switch_console /dev/cu.usbserial-A9H4CHBR 9600Start as a detached background session; attach later from another terminal.
For most day-to-day tasks you only need the plain form:
screen /dev/cu.<your-port-name> 9600
Logging (-L) and larger history (-h) become useful when you are capturing install logs or debugging intermittent issues.
8. Problems and solutions
8.1. screen /dev/... 9600 immediately prints [screen is terminating]
Common causes:
-
Wrong device name. Run:
ls /dev/cu.*and make sure you use an exact, existing name.
-
The adapter was not allowed. If you clicked Don’t Allow in the “Allow accessory to connect?” dialog, unplug and replug the cable, then click Allow.
-
Missing or blocked driver. Some CP210x and CH34x adapters need vendor drivers on older macOS versions. After installing and allowing the driver under System Settings → Privacy & Security, the device will appear as
/dev/cu.SLAB_USBtoUARTor/dev/cu.wchusbserial*.
8.2. No /dev/cu.usbserial-*, /dev/cu.SLAB_USBtoUART, or /dev/cu.wchusbserial* at all
Step through:
- Confirm the cable is firmly connected on both sides.
- Check System Information → USB to see whether the adapter shows up there.
- Try another USB cable; many phone charging cables only carry power.
- For CP210x / CH34x: install the official driver and allow it in Privacy & Security.
If the adapter does not appear in System Information either, there is likely a hardware issue with the cable or port.
8.3. Garbage characters instead of readable text
Almost always this is the wrong baud rate or serial format.
- Try
9600, then115200, then other speeds your device may use. - Most network gear defaults to 9600 8N1; many microcontroller boards use 115200.
You cannot change the baud rate inside an existing screen session, so exit (Ctrl+A then \, y) and start again with a new speed.
8.4. screen seems “frozen”
If the Terminal does not seem to react:
- Try
Ctrl+Athenqto resume output (you may have accidentally hitCtrl+Athens, which stops output). - If the display is still broken, exit
screen(Ctrl+Athen\,y) and runresetin the Terminal.
9. When screen is not enough – and where CliDeck fits
screen remains useful because it is always there, it is lightweight, and it can talk to serial ports without any GUI. For quick single-device work it does the job well.
However, it has clear limits:
- It is awkward with many devices in parallel.
- Hotkeys and concepts like regions and windows are not intuitive for everyone.
- Logging, auditing, and collaboration are bolted on, not first-class features.
CliDeck is built specifically to cover these gaps. It automatically discovers ports, applies correct connection parameters, opens console sessions directly in the browser, records logs and session history, and lets you work with multiple controllers and devices at once. For everyday engineering work screen becomes a fallback tool, while CliDeck serves as the main workspace where serial access, logging, automation, and collaboration are integrated into a single environment.
Conclusion
On macOS, the built-in GNU Screen 4.00.03 is a reliable low-level tool for serial console access. Once you know how to find the right /dev/cu.* device and how to exit a session cleanly, it gives you straightforward access to routers, switches, servers, and embedded boards through their console ports. For single-device tasks it is often faster to use screen than to install anything else, but for serious multi-device workflows, logging requirements, and team collaboration, a dedicated environment like CliDeck is significantly more powerful and convenient than raw screen sessions.
Who this is for
This guide is for network engineers, field technicians, remote hands, lab engineers, and system administrators who need to connect to, troubleshoot, log, or verify a serial console session on switches, routers, firewalls, appliances, servers, and other devices with console ports.
When to use this
Use this guide when:
- You need direct console access to a switch, router, firewall, appliance, server, or lab device.
- SSH or management-plane access is unavailable, unreliable, or not yet configured.
- You need to troubleshoot a USB serial adapter, COM port, baud rate, or terminal session.
When not to use this
Do not use this guide when:
- Do not use this guide as a substitute for vendor documentation, site policy, or a verified device-specific runbook when the operation is risky.
- Do not continue if the console output suggests you are connected to the wrong device.
Quick checklist
- Identify the device and console connector
- Use the correct console cable or adapter
- Find the correct serial port or COM port
- Start with the expected baud rate and 8N1 settings
- Press Enter to confirm the prompt
- If output is unreadable, check baud rate and line settings
- If the port will not open, check permissions, drivers, and whether another program is holding the port
- Save useful session notes or logs when the work matters
Traditional cable vs CliDeck workflow
A traditional USB serial cable is still the simplest option for quick local work. CliDeck becomes useful when the console session needs browser access, notes, runbooks, sharing, logs, remote hands support, or a portable controller workflow.
Console Server Go can work like a wired USB serial adapter when connected by USB, but it also adds SSH Console on SSH-enabled firmware builds, browser Workspace, live sharing, 24h+ battery operation, OLED status, and magnetic rack mounting.
Workflow
- Identify the device, connector, cable, adapter, and host operating system.
- Find the correct serial port or COM port and confirm permissions or drivers.
- Open the session with the expected baud rate and line settings, usually 8N1 unless documented otherwise.
- Press Enter and verify the prompt before running commands.
- Save notes or logs when the session supports a change, recovery, handoff, or evidence workflow.
Verification checklist
- The detected serial port or COM port matches the connected adapter.
- Baud rate, data bits, parity, stop bits, and flow control match the device expectation.
- The terminal shows a readable prompt after pressing Enter.
- No other terminal application is holding the port.
- Useful notes or logs are saved when the work matters.
Common mistakes
- Using the wrong cable or adapter for the console connector.
- Opening the wrong COM port or
/dev/cu.*device. - Assuming unreadable output means hardware failure before checking baud rate and 8N1 settings.
- Leaving another terminal application attached to the port.
CliDeck workflow fit
A traditional USB serial cable is still the simplest option for quick local work. CliDeck becomes useful when the console session needs browser access, notes, runbooks, sharing, logs, remote hands support, or a portable controller workflow.
Console Server Go can work like a wired USB serial adapter when connected by USB, but it also adds SSH Console on SSH-enabled firmware builds, browser Workspace, live sharing, 24h+ battery operation, OLED status, and magnetic rack mounting.
FAQ
Is a USB serial cable still enough?
Yes, for simple local work where one engineer is sitting next to one device. CliDeck is more useful when the console session needs sharing, runbooks, browser Workspace, remote hands support, logs, or longer operational context.
What should I check first when serial output looks like garbage?
Check the baud rate, data bits, parity, stop bits, flow control, cable type, and whether the device is actually using the expected console port.
Can CliDeck help with serial console work?
Yes. CliDeck Workspace helps organize terminal sessions, notes, runbooks, and logs. Console Server Go adds portable rack-side access, and Net Controller supports larger batch workflows.
Related guides
- Linux Serial Settings: Inspect stty Without Guessing the Console Profile - Inspect GNU stty settings for an identified serial adapter, compare framing and flow control, and account for device-open effects and session ownership.
- Linux Serial Adapter Identity: by-id vs by-path Before Reconnecting - Compare Linux USB serial by-id and by-path links, inspect udev properties, and resolve the intended adapter before reconnecting a console.
- Linux Serial Port Busy: Identify the Owner Before Disconnecting - Identify the process occupying a Linux serial device, release only the intended session, and verify access without killing unrelated processes.
- Cisco IOS XE Terminal Pagination: Capture Complete Console Transcripts - Remove IOS XE page pauses for one session, capture complete command output, inspect long lines, and restore the original terminal settings.
- How to Find Your Serial Port Name on macOS, Linux, and Windows - Find the correct serial port name for USB-Serial adapters on macOS, Linux, and Windows, with practical commands, Device Manager checks, and troubleshooting tips.